Select your language
Social Dude
QuickBooks Migration Failed? Here Is Exactly What Works

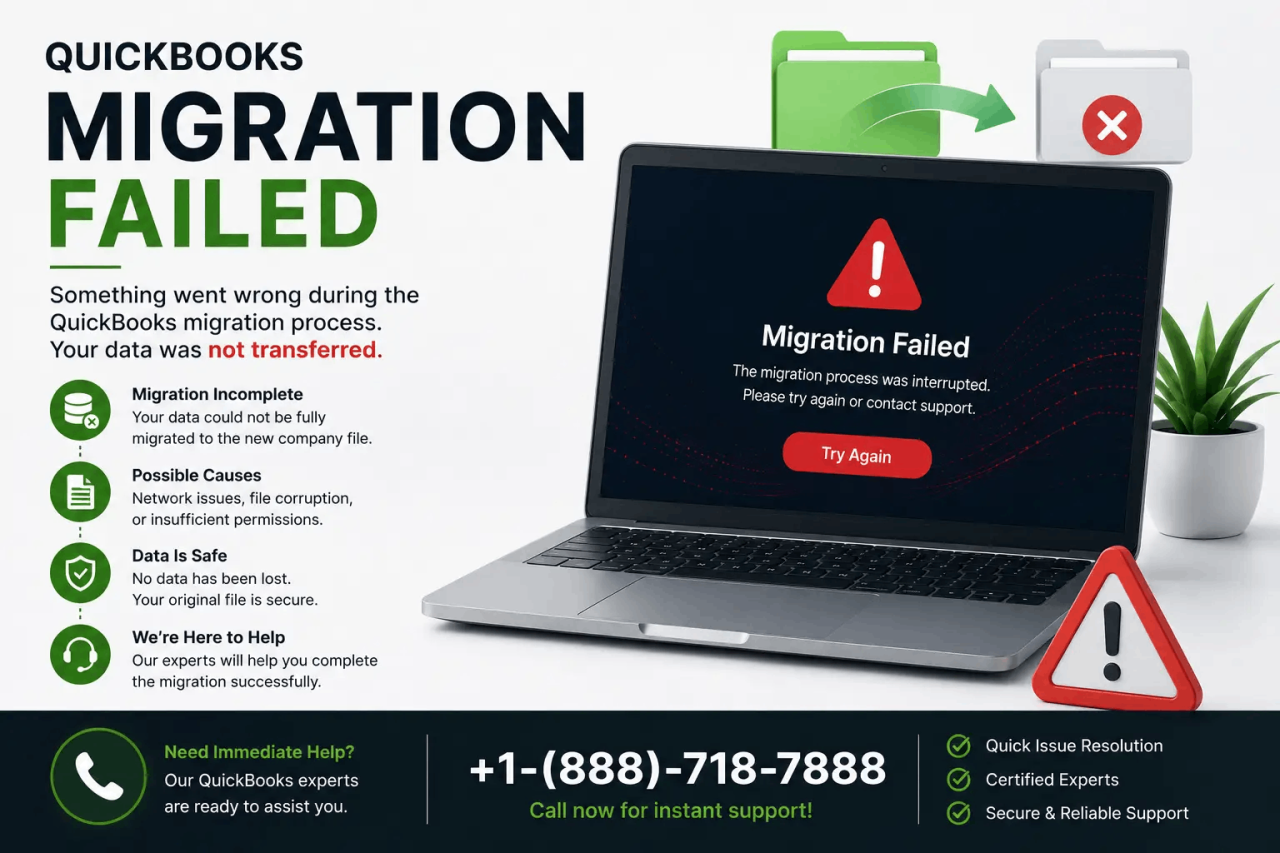
QuickBooks Migration Failed Unexpectedly: The Complete Guide to Moving Your Data Safely
You just bought a brand new computer. Faster processor, more memory, Windows 11 running smoothly. You are ready to move your QuickBooks company file and get back to business. You run the QuickBooks Migration Tool. You follow every step carefully.
You insert the USB drive into your new computer. And then—a grey box appears with words that make your stomach drop: "QuickBooks Migration Failed Unexpectedly." No explanation. No error code. Just failure. Your first thought is panic.
Is your company file gone? Are years of financial records lost forever? Take a deep breath. QuickBooks Migration Failed Unexpectedly is a scary message, but it almost never means your data is gone. In fact, over 90% of the time, your company file is perfectly safe on your old computer.
The migration tool itself hit a snag—usually something simple like a USB drive issue, a permission problem, or a Windows mismatch. But if you are staring at this error and you have no backup, do not experiment recklessly.
Call the official QuickBooks support team right now at +1-(888)-718-7888. They have recovered thousands of failed migrations. For those who want to fix it themselves, this guide covers everything you need to know.
What Does "QuickBooks Migration Failed Unexpectedly" Mean?
The QuickBooks Migration Tool (also called the QuickBooks Migrator Tool or "Move QuickBooks to Another Computer") is a free utility from Intuit that moves your entire QuickBooks setup from an old computer to a new one using a USB flash drive. It copies your company file, all your preferences, custom templates, forms, and even downloads and installs the correct version of QuickBooks on your new computer. When it works, it is one of the best tools Intuit has ever made.
When it fails with the message "QuickBooks Migration Failed Unexpectedly," the tool is telling you that the process stopped before completing, but it does not know why. The failure can happen at three different stages:
- During the copy stage on your old computer – The tool cannot read your company file or prepare the data for migration.
- During the transfer to the USB drive – The USB drive is corrupted, too small, formatted incorrectly, or has bad sectors.
- During the restore stage on your new computer – The tool cannot write the files, cannot install QuickBooks, or cannot find the migration data on the USB drive.
Here is the most important thing to understand: this error is almost always about the migration process itself, not about your data. Your actual .QBW company file is still sitting safely on your old computer. The migration tool just hit a roadblock.
The solutions range from simply reformatting your USB drive to running the QuickBooks Clean Install Tool. But if you have valuable data and you are not sure what to do, call 1-888-718-7888 before you attempt any fix that could make things worse.
Note:- QuickBooks Refresher Tool helps refresh damaged QuickBooks components, fix company file issues, and improve smooth accounting performance instantly.
Top Reasons Why QuickBooks Migration Fails Unexpectedly
Understanding the root cause is half the battle. Here are the most common reasons this error appears:
1. 32-Bit vs. 64-Bit Windows Mismatch (The #1 Cause)
- This is the single most common reason for migration failure. The QuickBooks Migration Tool uses 64-bit files when preparing the migration package. If your old computer has a 64-bit version of Windows but your new computer has a 32-bit version (or vice versa), the migration will fail every single time. The tool simply cannot translate between the two different system architectures. You can check your system type by right-clicking This PC or My Computer on your desktop, selecting Properties, and looking at System type.
2. USB Flash Drive Issues (Corrupted, Too Small, or Wrong Format)
- The Migration Tool requires a USB flash drive with enough free space (the tool tells you exactly how much—usually 150-250 MB). But more importantly, the drive must be formatted correctly. If your USB drive is formatted as exFAT or if it has bad sectors, the migration will fail. An old, cheap, or heavily used USB drive is a very common point of failure. Also, the drive cannot be encrypted or have any security software installed on it.
3. The Move_QuickBooks.bat File Is Not Run Correctly
- When you insert the USB drive into your new computer, Windows security features prevent the migration tool from running automatically. Many users do not know this. They expect the migration to start on its own, and when it does not, they assume something is wrong. You have to manually find and double-click the Move_QuickBooks.bat file on the USB drive. If you try to run any other file, the migration will fail.
4. QuickBooks Is Not Fully Updated on the Old Computer
- The Migration Tool requires QuickBooks 2018 or newer (US version). Even if you have a compatible version, it must be fully updated to the latest release. If your old computer has an outdated version with missing patches, the migration tool cannot correctly package your files. This is a very common cause of failure.
5. Company File Corruption
- If your company file (.QBW) has any corruption—even minor damage that does not affect daily use—the Migration Tool may detect it and stop the process. This is actually a safety feature. The tool refuses to copy damaged data to your new computer because that would just move the problem. The error message does not tell you that corruption is the cause, but it is a common hidden reason.
6. Antivirus or Firewall Blocking the Migration
- Your security software may see the Migration Tool as a threat and block it. This is especially common on the new computer when the tool tries to download and install QuickBooks from Intuit's servers. Norton, McAfee, Bitdefender, and even Windows Defender can interfere silently, causing the migration to fail with no clear explanation.
7. Insufficient Permissions (Not Running as Admin)
- The Migration Tool needs administrator privileges on both computers. On your old computer, you need to be logged in as the Company Admin in QuickBooks. On your new computer, you need to run the Move_QuickBooks.bat file as an administrator. If you skip either of these, the migration will fail.
8. One-Time Password Issues
- During the migration setup on your old computer, you create a one-time password. You must enter this exact password on your new computer. If you mistype it, forget it, or let too much time pass, the migration will fail. The password expires after a certain period, so do not create it hours before you are ready to migrate.
9. Damaged QuickBooks Installation on the Old Computer
- If the QuickBooks installation on your old computer is damaged—missing files, corrupted registry entries, leftover components from a previous version—the Migration Tool cannot correctly package your data. This often happens after a failed update or an improper uninstall of an older QuickBooks version.
10. New Computer Has a Different Windows User Name
- The migration tool expects certain folder structures. If your new computer has a different Windows username than your old computer, some file paths may break. This is less common but can cause unexpected failures, especially if you have custom templates or forms saved in user-specific folders.
If you have checked these common causes and still see "Migration Failed Unexpectedly," call 1-888-718-7888 for professional help.
How to Fix "QuickBooks Migration Failed Unexpectedly": Step-by-Step Solutions
Try these solutions in order. Do not skip steps. Each solution addresses a different cause.
Solution 1: Check 32-Bit vs. 64-Bit Compatibility (The Most Important Fix)
This is non-negotiable. If your computers have different system types, the Migration Tool will never work.
On your old computer:
- Right-click This PC or My Computer on your desktop or in File Explorer.
- Select Properties from the menu.
- Look for System type. It will say either "64-bit operating system" or "32-bit operating system."
On your new computer:
- Do the same thing. Right-click This PC → Properties.
- Look at System type.
If both computers show the same system type (both 64-bit or both 32-bit), proceed to Solution 2.
If they show different system types, the Migration Tool will not work. You have three options:
- Option A (easiest and recommended): Use the manual backup-and-restore method instead of the Migration Tool (see Solution 8). This bypasses the system type issue completely.
- Option B: Install a 64-bit version of Windows on the 32-bit computer (requires a clean Windows install).
- Option C: Borrow or use a different computer that matches the system type of your old computer.
If you are unsure how to proceed or need help with the manual method, call 1-888-718-7888 for guidance.
Solution 2: Try a Different USB Flash Drive
USB drive issues are extremely common. Do not use an old, cheap, or heavily used drive.
- Get a new or known-good USB flash drive (at least 1 GB in size—larger is fine).
- Format the drive as FAT32 or NTFS:
- Insert the USB drive into your computer.
- Open File Explorer, right-click the drive, and select Format.
- Choose FAT32 (if your drive is 32GB or smaller) or NTFS (if larger than 32GB).
- Uncheck Quick Format (do a full format to check for bad sectors).
- Click Start and wait for it to complete. This may take several minutes.
- Run the Migration Tool again from the beginning using the new USB drive.
Solution 3: Run Move_QuickBooks.bat Manually as Administrator
Do not expect the migration to start automatically. You must launch it manually on your new computer.
On your new computer:
- Insert the USB drive that you prepared on your old computer.
- Open File Explorer and navigate to the USB drive (usually D: or E:).
- Look for a file named Move_QuickBooks.bat. It may appear as just "Move_QuickBooks" with a gear icon.
- Right-click the file and select Run as administrator from the menu.
- If prompted by User Account Control, click Yes.
- Enter your one-time password exactly as you created it on your old computer.
- Click Let's Go and wait for the migration to complete.
If you cannot find the Move_QuickBooks.bat file on the USB drive, the migration was not copied correctly from your old computer. Go back to your old computer and rerun the migration setup.
Solution 4: Update QuickBooks on the Old Computer Before Migrating
An outdated QuickBooks version is a common cause of migration failure.
On your old computer:
- Open QuickBooks as administrator.
- Go to Help → Update QuickBooks Desktop.
- Click the Update Now tab.
- Check the box for Reset Update (this forces a complete refresh of update files).
- Click Get Updates.
- Wait for the download to complete. This may take 10-20 minutes depending on your internet speed.
- Close QuickBooks and reopen it. You will be prompted to install the updates.
- After the updates are installed, restart your computer.
- Run the Migration Tool again from the beginning.
Solution 5: Temporarily Disable Antivirus on Both Computers
Your security software may be blocking the migration tool without telling you.
On both computers (old and new):
- Temporarily disable your antivirus software. The method varies by program:
- Windows Defender: Open Windows Security → Virus & threat protection → Manage settings → Toggle Real-time protection to Off.
- Norton: Right-click the Norton icon in your system tray → Disable Auto-Protect → Choose a duration.
- McAfee: Right-click the McAfee icon → Change settings → Real-time scanning → Turn off.
- Bitdefender: Open Bitdefender → Protection → Antivirus → Toggle Off.
- Also temporarily disable Windows Firewall (Control Panel → Windows Defender Firewall → Turn Windows Defender Firewall on or off → Turn off for both private and public networks).
- Run the Migration Tool again on both computers.
- After the migration succeeds (or fails), re-enable your antivirus and firewall immediately.
- If the migration succeeds only when antivirus is off, add permanent exclusions for the QuickBooks folder and the migration tool files.
Warning: Only disable antivirus temporarily. Do not browse the web, download files, or open email attachments while protection is off.
If disabling antivirus fixes the issue but you need help adding permanent exclusions, call 1-888-718-7888.
Solution 6: Run QuickBooks File Doctor on Your Company File
If your company file has minor corruption, the Migration Tool may refuse to migrate it. The QuickBooks File Doctor can repair many types of corruption.
On your old computer:
- Download and install the QuickBooks Tool Hub from Intuit's official website (it is free).
- Open the Tool Hub and click on Company File Issues.
- Select Run QuickBooks File Doctor.
- Use the Browse button to locate your company file (the .QBW file).
- Select Check your file (not network issues).
- Click Continue and enter your QuickBooks admin password if prompted.
- Wait for the scan to complete. This takes 10-30 minutes depending on the size of your file.
- If File Doctor repairs the file, run the Migration Tool again.
- If File Doctor reports that it cannot repair the file, your company file has severe corruption. Call 1-888-718-7888 immediately.
Solution 7: Use the QuickBooks Clean Install Tool on the New Computer
If the migration fails during the installation phase on your new computer, the new computer may have a damaged QuickBooks installation or leftover files from a previous version.
On your new computer:
- If QuickBooks was partially installed, uninstall it via Control Panel → Programs and Features.
- Download and run the QuickBooks Clean Install Tool (from the QuickBooks Tool Hub → Installation Issues).
- Follow the prompts. The tool will remove all leftover QuickBooks files and registry entries.
- Reboot your computer.
- Run the Migration Tool again from the USB drive.
- Let the tool download and install QuickBooks fresh.
Solution 8: Manual Backup and Restore Method (Plan B - Always Works)
If the Migration Tool absolutely refuses to work, you can always fall back to the manual method. This takes longer but is extremely reliable and does not depend on the Migration Tool at all. This method works even if your computers have different 32-bit/64-bit architectures.
Step-by-step manual migration:
On your old computer:
- Open QuickBooks.
- Go to File → Back Up Company → Create Local Backup.
- Choose Local Backup and click Options.
- Select Full backup (not portable company file).
- Save the backup file (.QBB) to your USB drive or an external hard drive.
- Also copy your company file (.QBW) directly to the USB drive as a second backup (just in case).
- If you have custom templates, copy them from C:\Users\Public\Documents\Intuit\QuickBooks\Templates.
On your new computer:
- Do not use the Migration Tool. Install QuickBooks manually using your installation CD or by downloading from your Intuit account (manage.intuit.com).
- During installation, enter your license key when prompted.
- After installation completes, open QuickBooks.
- Go to File → Open or Restore Company → Restore a backup copy.
- Select Local Backup and navigate to your .QBB file on the USB drive.
- Restore the file to a local folder like C:\QuickBooks (not a cloud-synced folder like Dropbox or OneDrive).
- Open the restored file and verify all your data is there.
- Copy any custom templates to the same location on your new computer.
This manual method works every time because it bypasses the Migration Tool entirely. It requires a few more steps, but it is 100% reliable. If you need help with this process, call 1-888-718-7888.
Solution 9: Create a New Windows User Account on the New Computer
Sometimes your Windows user profile on the new computer has permission issues that block the migration.
- On your new computer, press Windows + I to open Settings.
- Go to Accounts → Family & other users.
- Click Add someone else to this PC.
- Click I don't have this person's sign-in information → Add a user without a Microsoft account.
- Create a username (e.g., MigrationUser) and leave the password blank.
- Under the new account, click Change account type and select Administrator.
- Log out of your current account (Start menu → your profile picture → Sign out).
- Log into the new account you just created.
- Run the Migration Tool again from the USB drive.
Solution 10: Perform a Clean Boot Before Migration
A clean boot starts Windows with only essential services, eliminating conflicts from background software.
On your new computer (and optionally on your old computer):
- Press Windows + R, type msconfig, and press Enter.
- Click the Services tab.
- Check Hide all Microsoft services (this is very important).
- Click Disable all.
- Click the Startup tab → Open Task Manager.
- In Task Manager, disable all startup items one by one.
- Close Task Manager and click OK in System Configuration.
- Click Restart.
- After reboot, run the Migration Tool again.
- To exit clean boot, go back to msconfig, select Normal startup, and restart.
Critical Prevention Tips for Future Migrations
- Always back up your company file before migrating – Keep a separate .QBB backup on an external drive or cloud storage.
- Verify both computers have the same Windows architecture (both 64-bit or both 32-bit) before starting.
- Update QuickBooks to the latest release on your old computer before migrating.
- Use a high-quality, brand-name USB flash drive – SanDisk, Samsung, or Kingston. Avoid no-name drives from discount stores.
- Format the USB drive before using it – Do a full format, not a quick format, to check for bad sectors.
- Write down your one-time password immediately – Do not rely on memory.
- Close all other programs on both computers during migration.
- Disable antivirus temporarily on both computers before starting.
- Run both the migration setup and the .bat file as administrator.
- Do not interrupt the migration – It can take 10-30 minutes. Be patient.
- Keep your QuickBooks license key handy – In case you need to fall back to manual installation.
Frequently Asked Questions (FAQs) About QuickBooks Migration Failed Unexpectedly
Q1: Does "Migration Failed Unexpectedly" mean I lost my company file?
- No. This error means the migration process failed, not that your data is lost. Your original company file is still safe on your old computer. As long as you did not delete it, you can try the migration again or use the manual backup-and-restore method. If you are worried, copy your .QBW file to a USB drive manually right now as a safety backup before attempting any fixes.
- The official QuickBooks Migration Tool is designed specifically for USB flash drives. For network migrations or external hard drives, you would need to use the manual backup-and-restore method (Solution 8). Intuit does not officially support network migration or external hard drives with the Migration Tool.
A successful migration takes 10-30 minutes total:
- 2-5 minutes on the old computer to prepare and copy to USB
- 10-20 minutes on the new computer to copy files and install QuickBooks
If the progress bar on either computer stops moving for more than 10 minutes, the migration has likely failed. Cancel it, run the Clean Install Tool on the new computer, and try again.
- The one-time password is not stored anywhere on your computer. It is only shown to you once when you create it. If you lose it, you cannot complete the migration using the tool. Your only option is to use the manual backup-and-restore method (Solution 8). This is why you should always write down the password immediately when you create it.
Yes, but with important caveats. The Migration Tool works as long as:
- QuickBooks is updated to at least the 2018 version
- Both computers have the same system type (both 64-bit or both 32-bit)
- QuickBooks 2018 or newer is installed on the old computer
However, Windows 7 is no longer supported by Microsoft for security updates. For security reasons, consider upgrading your old computer to Windows 10 or 11 before migrating, or use the manual backup method.
If you have tried all the solutions above and still get "Migration Failed Unexpectedly," the problem is likely one of these:
- Severe corruption in your company file that File Doctor cannot fix
- A failing hard drive on your old computer (bad sectors)
- Deep Windows corruption on your new computer
- Hardware issues with the USB port or motherboard on either computer
In these cases, call 1-888-718-7888 for professional support. Do not keep trying the same fixes repeatedly.
- Yes, the Migration Tool works for QuickBooks Pro, Premier, and Enterprise. However, for Enterprise users with advanced inventory features or multiple company files, the manual backup-and-restore method is often more reliable. Enterprise users should also ensure the new computer meets the higher system requirements (more RAM, faster processor, more disk space).
The tool does not automatically deactivate the license on the old computer. After a successful migration:
- Verify QuickBooks works correctly on your new computer.
- Uninstall QuickBooks from your old computer to free up the license for another computer.
- If you see activation errors on your new computer, call Intuit to release the license from the old computer.
Yes. The Migration Tool downloads the latest version of QuickBooks from Intuit's servers during the installation phase on your new computer. Without an internet connection, the migration will fail. Make sure your new computer has a stable, active internet connection before starting.
Q10: I tried the manual backup method and that also failed. What now?If both the Migration Tool and the manual backup method fail, your company file is likely severely corrupted. Do not keep trying to open or copy it—each attempt can worsen the corruption. Your options:
- Restore from an older backup (hopefully you have one from last week or last month).
- Use QuickBooks File Doctor with the most aggressive settings (run it two or three times).
Professional recovery services have specialized tools that can extract data from corrupted QuickBooks files that standard tools cannot read.
Final Thoughts: A Failed Migration Is Not the End of the World
QuickBooks Migration Failed Unexpectedly is one of those error messages that makes your heart stop. You see "failed" and "unexpectedly" and immediately think the worst. But here is the truth: this error is almost never catastrophic. Your data is still on your old computer. Your company file is still there. The migration tool just hit a roadblock.
In most cases, the fix is simple. Check that both computers have the same 64-bit or 32-bit Windows. Use a different USB drive. Run the .bat file as administrator. Update QuickBooks. Disable antivirus. One of these will solve the problem for the vast majority of users.
If those quick fixes do not work, the manual backup-and-restore method is your safety net. It takes a few more minutes, but it works every time. You do not need the Migration Tool to move QuickBooks. A simple backup, a USB drive, and a fresh installation on your new computer will get you there. This method has been working for decades, long before the Migration Tool existed.
And if you are in a hurry, if you have no backup, or if you have tried everything and still see that dreaded message, do not hesitate. Call 1-888-718-7888. The technicians on that line have seen every possible migration failure. They can remote into your computers and get your data moved safely. One phone call can save you hours of frustration and protect years of financial records.
Before your next migration (because there will always be a next computer), prepare. Keep a current backup. Know your QuickBooks license key. Have a clean USB drive ready. And keep that support number saved. Migrating QuickBooks should be a quick task, not a nightmare. You have the tools and knowledge now. Go get it done.
Comments